Components of the Dilution Refrigerator Measurement System
If you’ve read our previous blog “How Does a Dilution Refrigerator Work?”, you are familiar with heart of a dilution refrigerator – the dilution unit. You’ll also know that there is a bunch more to a dilution refrigerator measurement system than only that. If you haven’t had a chance to read that blog, go read it before this one!
Let’s now take a look at the other components of the dilution refrigerator measurement system. What is done to precool the system, ways that the system is protected from the external environment, and the gas handling to move the helium around the system.
Stages of the Dilution Refrigerator
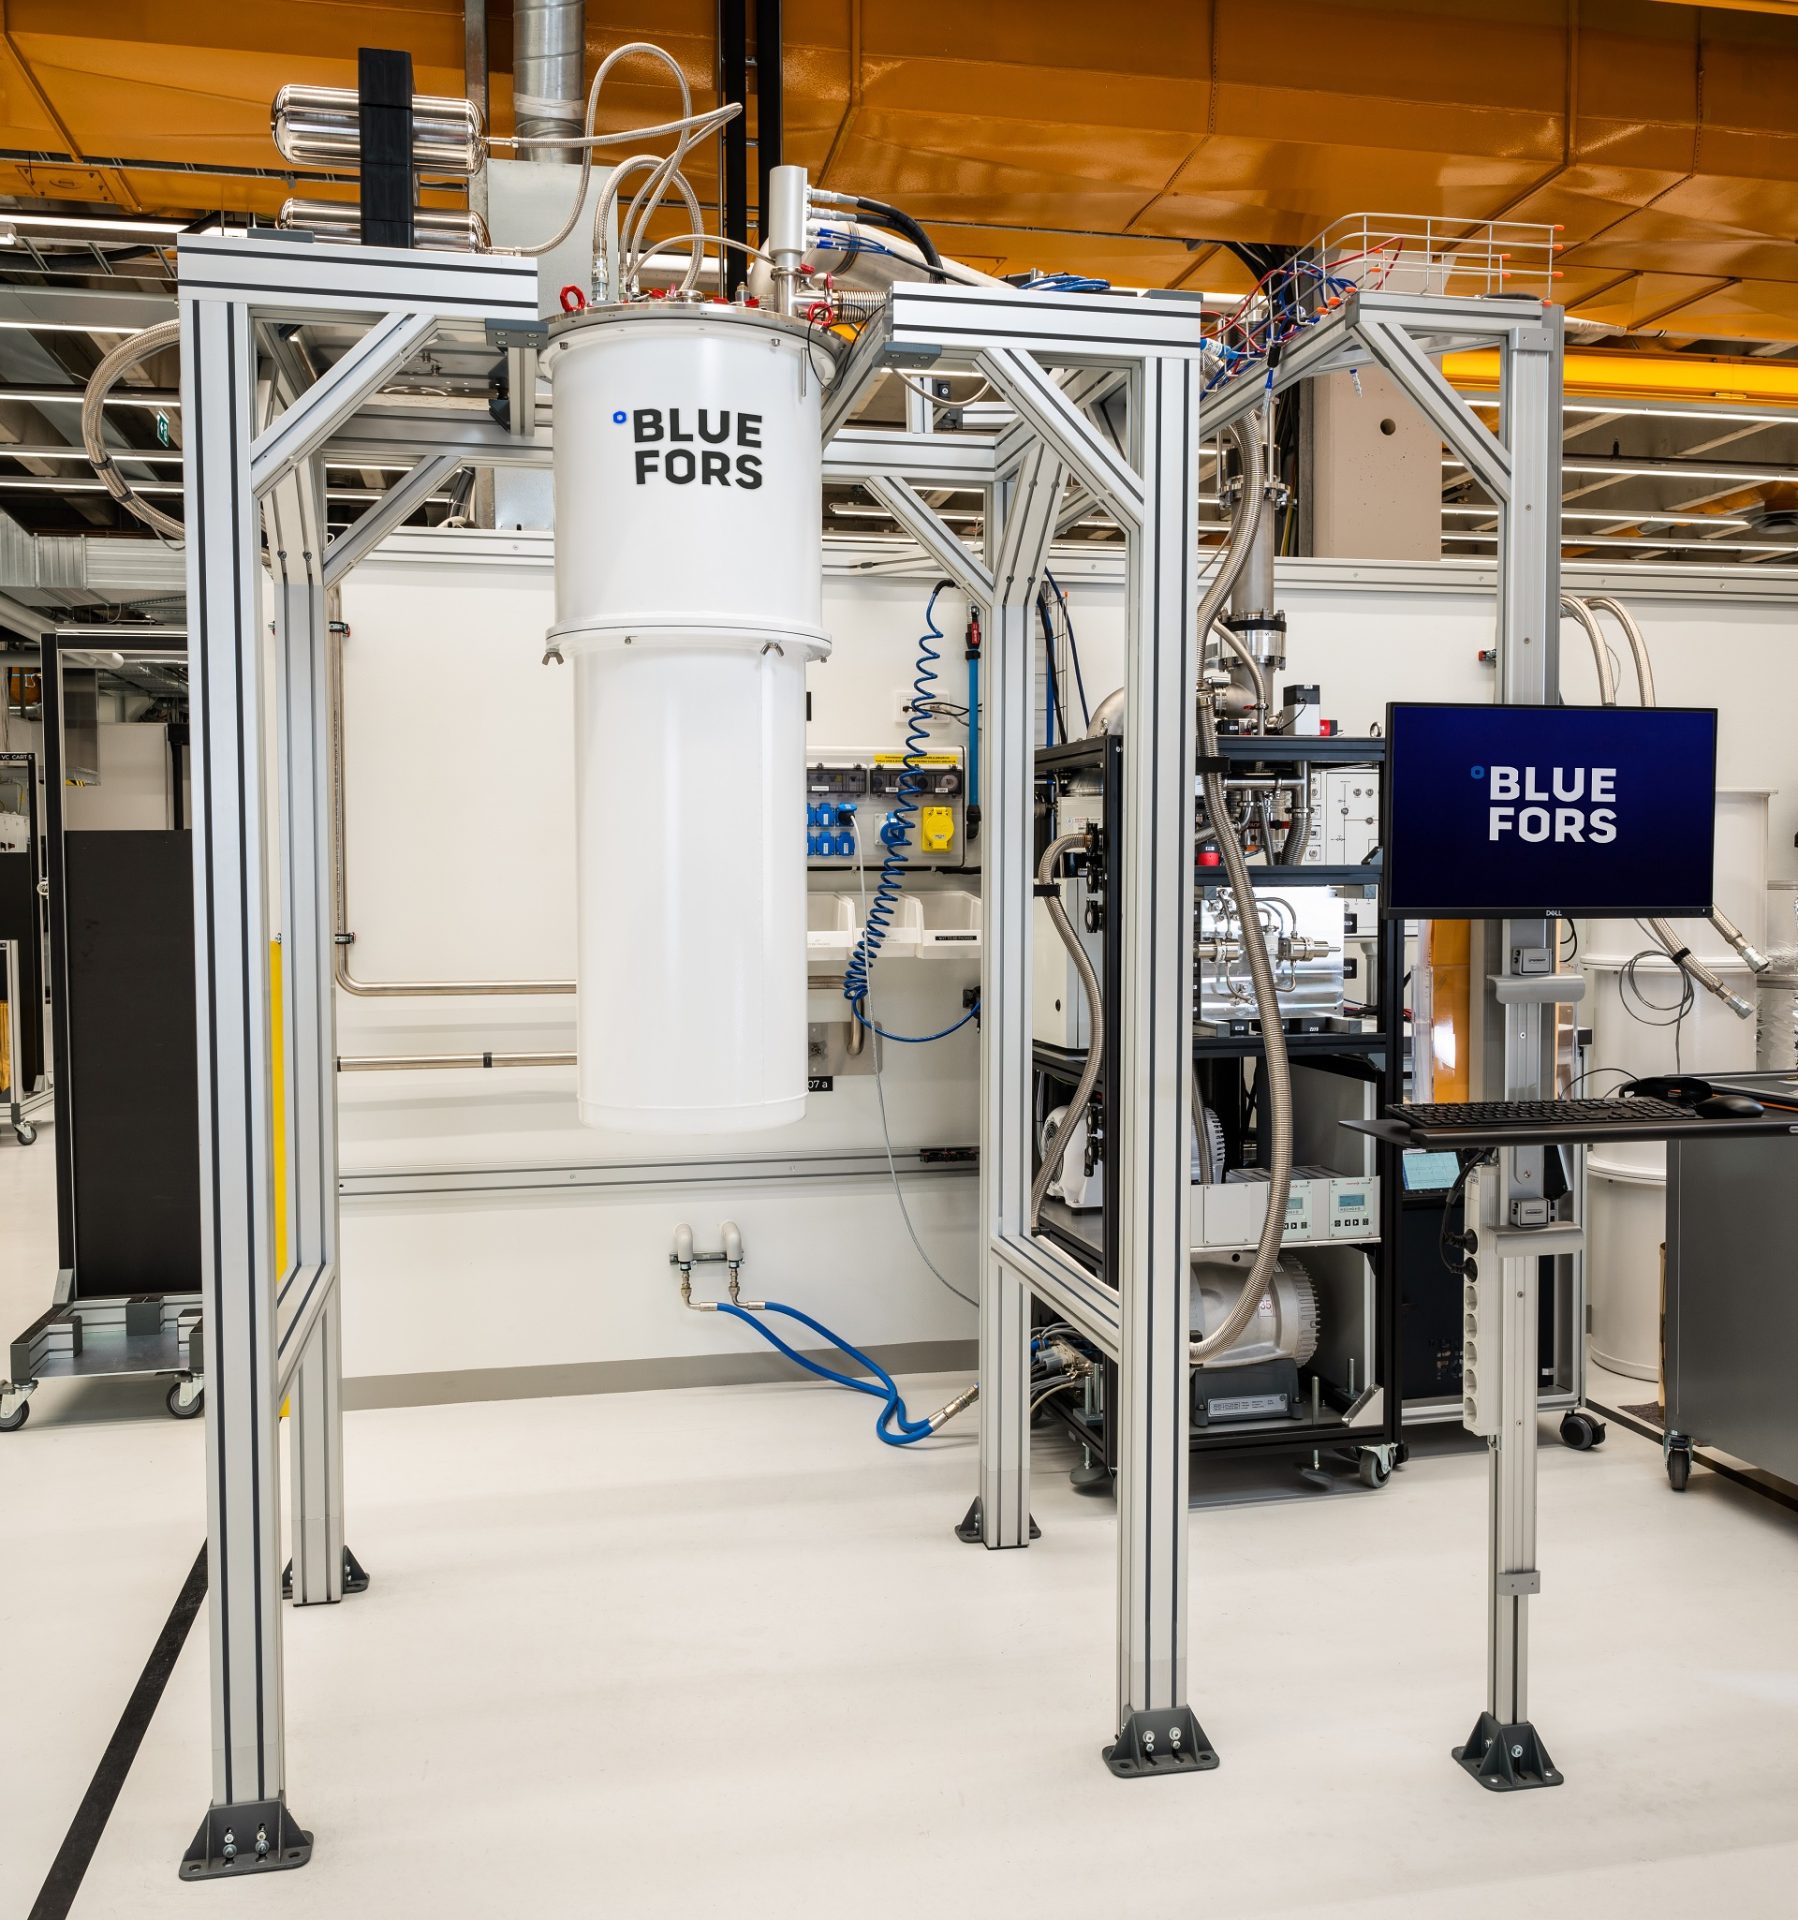
First thing you’ll notice about a dilution refrigerator is that the entire system contains different stages, and not just the ones cooled by the dilution unit. In a steady state of operation there are stages that stay in room temperature, at about 40 kelvin, and at about 3 Kelvin. All of these have corresponding metallic plates under them: the room temperature flange, the 50K Flange, and the 4K Flange (naming convention for the flanges differs from the actual temperature). After that come the Still Flange, Cold Plate, and Mixing Chamber Flange, which are around the dilution unit. See below for a helpful cross-section.

Cooling the Dilution Refrigerator to 4 Kelvin and Pre-Cooling
To reach millikelvin temperatures, the dilution refrigerator system is first precooled to a low enough temperature for helium to liquefy so the dilution process can be started. In the cryogen-free dilution refrigerators, a pulse tube cooler pre-cools the helium mixture to low enough temperature to liquefy it. Then, additional cooling to still flange and below is provided by evaporating helium, which eventually brings the temperature low enough for the phase-separation to occur after which the dilution cycle can begin to work. No manual labor is required during the precooling, just as there isn’t any during the actual dilution refrigerator cooling cycle.
Precooling the cryostat is done by using a two-phase pulse tube, with first phase cooling the 50K Flange and the second phase cooling the 4K Flange. The pulse tube is connected to the flanges via special flexible heat links made of copper. It’s also mounted on a special suspension system that prevents from transferring the vibrations from the pulse tube into the dilution refrigerator, as any mechanical vibrations would be converted into heat.
The stages around the dilution unit are precooled with heat switches, that are located between the 4K Flange and the Still Flange, and between the Still and Mixing Chamber stages. The heat switches are used for the initial pre-cooling of the dilution refrigerator with the pulse tube from room temperature to low enough temperature for the dilution refrigerator cycle to start, approximately 4.2 kelvin. After the system is cooled to that temperature, the heat switches’ thermal contact with the pulse tube are broken. Then the pulse tube continues to cool down just the 50K and 4K Flanges, with the incoming helium-3 (He-3) precooling there.
The incoming He-3 gas is pre-cooled to below 4.2 kelvin by different heat exchangers in the upper stages of the system. He-3 returning to the system arrives via a condensing line, which leads to a cold trap at approximately 50 kelvin. It takes out any contamination of circulation by freezing it and also serves as a heat exchanger. After that the incoming gas is thermalized around the pulse tube before moving through to the dilution unit.
Protecting the System from the External Environment
Because the dilution refrigerator system is operated at very low temperatures, it must be kept in a vacuum and shielded from the external environment. For this purpose, there is a vacuum can covering the system. Additionally, each of the different temperature stages are covered by a radiation shield preventing heat load by radiation from the warmer stages to the lower and colder stages.
The vacuum can is attached to the room temperature flange and keeps everything in vacuum. Because the vacuum can parts are staying at room temperature, rubber seals can be used to easily achieve a high vacuum. Under it the 50K, 4K, and Still Flanges all have their own radiation shields, shielding the more inner parts from thermal radiation. This reduces the heat load they experience substantially. Once the shields and cans are attached, the vacuum is pumped using the Gas Handling System.

The Gas Handling System
The Gas Handling System (GHS) has all the pumps, pumping lines, valves, pressure gauges, etc., which are necessary to operate the entire system. Helium is pumped using its pumps and at the very early stages of the cool-down air is evacuated from the system using its pumps to get an isolating vacuum.
The GHS is used to run the closed helium circulation, with large pumps as you need lots of pumping power for it. The GHS is contained in a single cabinet. Because of acoustic noise this unit is preferably placed in a separate room from the cryostat, together with a compressor required for the operation of the pulse tube.
The Gas Handling System comes with a PLC (Programmable Logic Controller) control system, which manages the pumping of the gas and other control operations. To operate the system, a separate Control Software is provided for remote control and automatic cooldown and warm-up processes. The software enables operation to be carried out automatically, or performed manually if the user chooses. In addition to controlling the system, the Control Software provides users with diagnostics and history logs of the system.

Cooling Power on Demand
All these components must function reliably together to provide the cooling power a dilution refrigerator is able to. Working together they enable operation of the dilution unit and provide the user with an ease of use, which enables them to do their experiments without significant effort to reach millikelvin temperatures. After pumping a good vacuum, one can start the pulse tube and achieve 4.2 kelvin temperature. Then start the dilution refrigerator operation and ultimately achieve 7 millikelvin, providing the ability to perform experiments that require these ultra-low temperatures.